Hello Friends!
After a week of summer school with kindergarten friends, I was ready for a break. But after some days in my classroom with kids, I had an idea for a project and just couldn't wait to get started. I don't have a classroom library, per say. Instead I have 16 huge baskets of leveled books spread out on 4 different shelves in my classroom. My students have a book bin they keep in their cubby. They choose books on their level and keep them in their book bin for a week and then we change them out. I've done this for a few years now and for me, it works really well. I have my reading stations set up so that students do a tub activity and then get their books for independent reading. After some stamina is built, tub activities take less time and then there is more time for reading to self. One thing I decided I need to tweak was how books are changed out. For a student on level B, I have 2 huge baskets of B level books. I would only pull one out, but kids took FOREVER to find their 5 books because there were so many to choose from.
I decided to get the small book bins from Wal-Mart and have a bin for each level, as needed. This would give the students less books to look through at a time and then I could change out my bins every so often to give them new books and hopefully create some excitement. Hubs had a shelf in the shed that worked perfectly (even though it was grudgingly given, lol).
This is how it looks now. It's a start. All of the white space above my wooden shelf says DECORATE ME! I'm still thinking about what to do there. The wooden shelf will house word work folders once school gets started. I didn't have a whole lot of time to do more with my wild man running around my room.
Friday, July 20, 2018
Wednesday, July 11, 2018
Let's Talk About Morning Messages
Hey friends! Today, I wanted to talk to you about morning messages. Now, I have a easel/whiteboard that I LOVE and spend big bucks on. I envisioned writing wonderful morning messages on it before students arrived with pretty handwriting, maybe even some pictures drawn on there. I think we all know how long that lasted. I wanted meaningful morning messages that were centered around what we were learning. I spent one summer creating morning messages centered around themes of study. I ended up with over 50 weeks worth of messages.
Here we are FIVE years later! Using those morning messages has saved me so much time! Every morning, all I have to do is open the PDF for the theme I'm on(it's usually still open from the day before) and scroll to the message I want. Easy peasy. This is a time that we talk about days of the week, read the message together, target and find specific sight words and then (my favorite part) discuss the message. Depending on the message, I may have my students partner talk, each have a turn in front of the whole class, we may create a thinking/bubble map, create a graph or write about it. It involves absolutely NO prep. This gives your kids a chance to communicate with each other, have interesting conversations and help with your classroom family atmosphere.
Here we are FIVE years later! Using those morning messages has saved me so much time! Every morning, all I have to do is open the PDF for the theme I'm on(it's usually still open from the day before) and scroll to the message I want. Easy peasy. This is a time that we talk about days of the week, read the message together, target and find specific sight words and then (my favorite part) discuss the message. Depending on the message, I may have my students partner talk, each have a turn in front of the whole class, we may create a thinking/bubble map, create a graph or write about it. It involves absolutely NO prep. This gives your kids a chance to communicate with each other, have interesting conversations and help with your classroom family atmosphere.
I still use these messages every day.
Here are some pictures of what it looks like in my classroom.
Here, I read the message with help, asked students to find specific sight words and circled them and then let them talk with their designated partner to answer the question. After some think and talk time we created a bubble map together.
Below is an example of how to tie the morning message in with your unit of study for the week. This gives students a chance to talk about what they are learning and connect it to other things.
With this message students had the chance to talk to a partner and then write their response in their journal.

Saturday, July 7, 2018
Let's Talk About Brag Tags
Hello friends! Let's talk about brag tags.
So, this was my day:

That was a little over 700 brag tags. And I'm sure I've already prepped that and more before today. And...I'm probably not done. But I'm excited about these, so that's ok, right? (Asking for a friend.)
I wanted to share some things I've learned about using brag tags and hopefully give you what you need to take that leap, if you haven't already.
Laminate
Yes, they need to be laminated. But, it doesn't matter if it's that thin stuff on the big roll at your school or the good stuff from your home laminator. I print mine on regular paper. Typically, I laminate them at home because it's easier for me. The ones I did at school with the flimsy laminate held up just fine.
Hole Punch
The 3 whole punch is your FRIEND! My hand would not be able to hand the single hole punch for this many. Using the 3 hole punch, you get 3 done at once and move faster (without killing your hands). It really doesn't matter if the hole isn't exactly in the center. The kids won't notice (or so I tell myself).
Storage
Being totally honest, last year was the first year I used brag tags. I didn't have a fancy storage system. I used rubber bands to band like ones together and threw them all in a gallon size zippy bag. And guess what? It worked.
This year, I'm getting fancy. I couldn't help it. I searched all over for one of these puppies. I found a ton online, but I needed to SEE it, for real, in person. I finally found this one at Northern. Home Depot and Lowes have them online. And some more honestly, if I couldn't find what I wanted, hubs would have lost the ones he has in the garage for nuts and bolts.
I would recommend getting one with wide and narrow drawers. Pictured above is a wide drawer. The narrow ones will hold about 3 pages of brag tags cut up and the wide ones will hold about 18 pages of brag tags cut up (yes, I stuffed mine to the limit).
Student Storage
My students have a necklace. No, they can't open the silver beaded necklaces and put the tag on their self. Yes, it can be a pain, especially if several students have a tag at once. But, I made it work. I've seen that another option is to give the students a notebook and let them glue the tag in it. Then they have a brag book. (and that would eliminate laminating and hole punching, hooray!)
I hung small command hooks in their cubbies to put their necklace on. They all held up the entire year and are ready for another year.
Here are some up close pictures of some of my brag tags. Yes, I have a lot. Yes, I'm still adding more. Yes, I may have a little problem. I figure if I see that I'm not giving them out like I really want to, I can choose one behavior tag and focus on it for the week. I give the academic tags out as each student reaches that goal. If I don't do it right then, I know I will absolutely forget. The kids really get excited about these. Especially on the days I let them wear their necklace to lunch and they can show what they've earned. Last year, I really felt like this had a positive impact on my classroom. I'm excited to see how it goes this year. If you have any questions, let me know!

Labels:
Brag Tags
Saturday, November 11, 2017
Sight Word Worksheets for the First 100 Words
Hello friends! With my group this year, it seems like sight words just aren't sticking. I wanted to compile all of the things that help my little ones into one sheet to use during our RTI time. This is what I came up with. So far, this tedious labor of love has helped tremendously! Download the preview on TpT to try 3 of them for free!


Labels:
Freebie,
RTI,
sight words,
Word Work,
Worksheets
Tuesday, April 4, 2017
Beginning, Middle and Ending Sounds
Hello friends!
I know, you know how important beginning, middle and ending sounds are to our little learners. We spend so much time breaking those words apart and stretching to hear the sounds. Here are some tools to help do this during station time. With practice this can become an independent station for your little learners.
I know, you know how important beginning, middle and ending sounds are to our little learners. We spend so much time breaking those words apart and stretching to hear the sounds. Here are some tools to help do this during station time. With practice this can become an independent station for your little learners.
Print, laminate and cut the strips. Fold on the dotted line and secure with a clothes pin (get those fine motor skills!). Students can use a dry erase marker to answer each strip and then open the clip to check their work. This is for beginning, middle and ending sounds. It also includes just the picture and 3 blanks for students to fill in the whole word.
There are 3 worksheets for each set for you to use as an assessment.
These puzzles would work well in a pocket chart. Simply print, laminate and cut. Students will put the words together. The picture makes it self checking. A recording sheet is included for student accountability.

Saturday, February 28, 2015
Why I Teach
I'm so glad to be a part of this group. Our little group has blessed me more than they realize. I really needed to sit down and remember why I wanted to be a teacher. I'm going to be honest, this year has been hard. Even with great admin support, a supportive K team, lots and lots of prayer and a supportive hubby, it has been really hard.
I know this to be totally true:
And, oh, how I've grown this year.
And this is something that we teachers completely understand:
And it really helps when your grade level is a TEAM.
All that said, I LOVE my job. I know without a doubt God's plan for me is to teach!
I wanted to be a teacher to make a difference. Now that I'm in my 6th year, I see now that there is so much more to it.
I cheer my kinder babies on to do the best they can.
I celebrate each child's success, big or small.
I hug them and love them. They know that we're not just a class - we are family.
I live for those light bulb moments.
I am always amazed at their growth every year.
I have this hanging on my wall behind my computer:
So even when the day, month or even year seems hard, remember why you teach. You never know what each year may bring. And honestly, none of us chose teaching because it's easy. This is a hard job - physically, emotionally and mentally. But it IS worth it!
I teach for all the little reasons. <3
Next up is Teacher Tam!

Saturday, August 23, 2014
Chair Pocket Giveaway!!
In honor of my first student birthday of the year coming up and that I am as caught up as I'm going to get, I wanted to have a giveaway! You all have been so incredibly supportive of my ETSY shop and I wanted to do something little to show my gratitude.
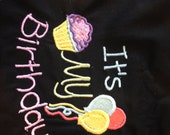
I have loved using the personalized chair pockets in my classroom. I'm also really excited about getting to use my birthday one.
This works just like a regular chair pocket, just special.
I've made them for special helper, author's chair and even my computer center.
I have options to create your own or choose your own words to personalize it for your classroom.
Here are some pictures of chair pockets offered:
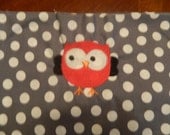
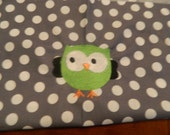
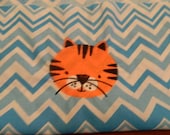

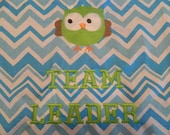

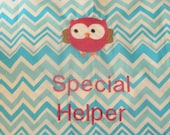
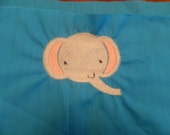

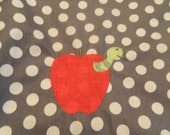

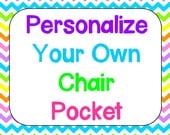
Here are some pictures of chair pockets offered:


As you can tell, I've had a lot of fun with my embroidery machine!
But, enough about me, let's get on to the giveaway!
But, enough about me, let's get on to the giveaway!
I'm giving away one of my chair pockets - winner's choice!
{Valued up to $7}
Be sure to SHARE about this giveaway! There will be an extra winner {valued up to $7} for every 100 entries!!
Be sure to SHARE about this giveaway! There will be an extra winner {valued up to $7} for every 100 entries!!

Labels:
chair pocket
Subscribe to:
Posts (Atom)


